 Blaine Exterior
 Building New in Point Roberts Means Building for Salt Air, Not Just Rain
Point Roberts sits on its own peninsula, surrounded on three sides by the Strait of Georgia and Boundary Bay. That geography is part of what makes it a desirable place to build — but it also means new homes here take a different kind of weather exposure than a lot in town or up on the hillside in Blaine proper. Salt-laden air moves off the water and settles on everything, driving rain comes in sideways during winter storms, and the shaded, moisture-heavy microclimate keeps moss and algae active for most of the year. New-construction windows have to be selected and installed with all three of those factors in mind from day one, not retrofitted for them later.
When we install windows on a new build in Point Roberts, we're not just following the plan set — we're thinking about which elevations take the worst weather, how the wall assembly manages bulk water and vapor, and what hardware and finish will actually hold up a few blocks from saltwater. That's a different job than a standard interior remodel, and it's why new-construction window work deserves its own plan, not a generic install.
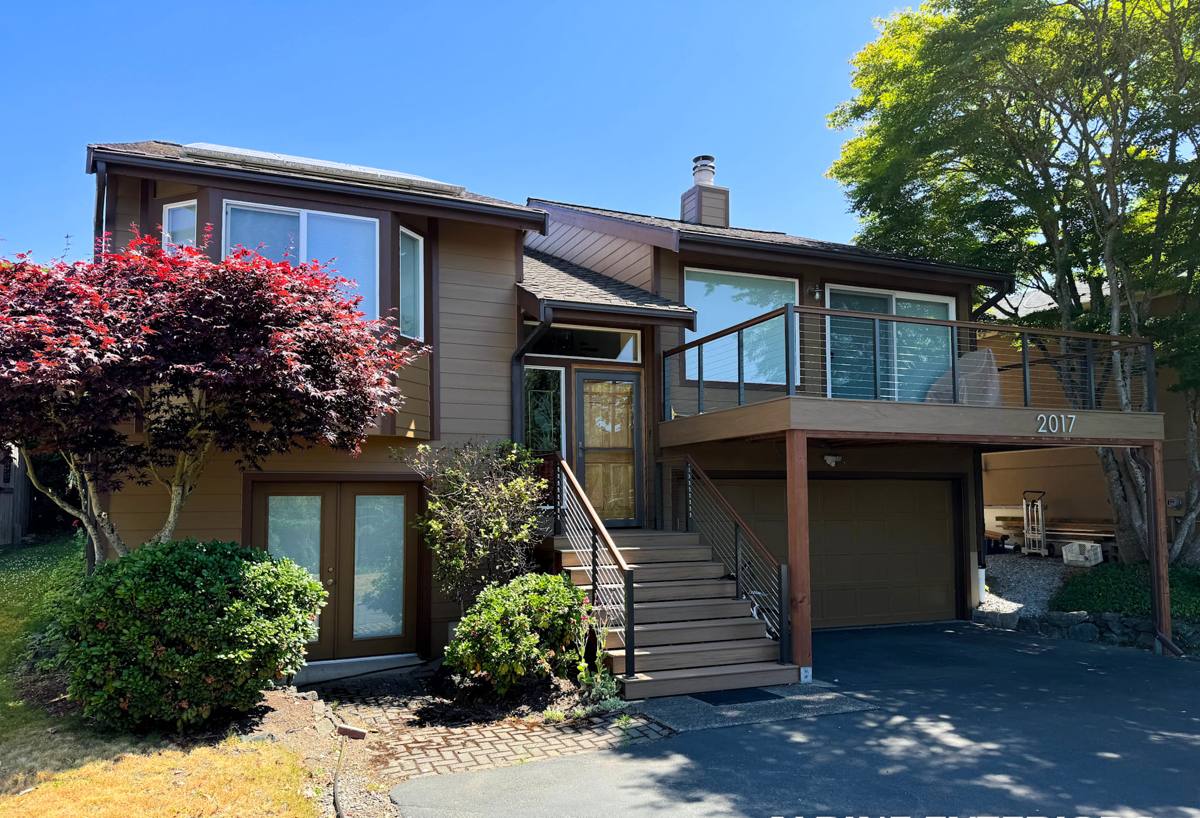
What Whatcom County's Coastal Exposure Does to Windows Over Time
None of this shows up in year one. It shows up in years five through fifteen, which is exactly when a poorly detailed new-construction window install turns into a rot or leak problem hidden behind trim.
Salt Air and Corrosion
Airborne salt accelerates corrosion on exposed fasteners, hinge hardware, and lower-grade cladding finishes. Aluminum-clad and vinyl windows vary a lot in how their coatings and hardware hold up to salt exposure — this is a real selection factor for a Point Roberts build, not a marketing detail.
Driving Rain and Wind-Driven Water
Storms coming off the strait push rain horizontally against west- and southwest-facing walls. Flashing and sealant details that would be adequate on a sheltered inland lot can fail here because the water is being forced into the joint under wind pressure, not just running down by gravity.
Moss, Algae, and Sustained Moisture
Shaded elevations and tree-lined lots stay damp longer through fall and winter. Moss and algae growth on nearby roofing and siding surfaces is a sign of how long moisture sits on this site — window sills, trim, and drainage paths need to be detailed so water actually leaves the assembly instead of collecting against it.
Quick Reference: Coastal Stressors and What They Mean for Your Windows
| Condition | Effect on Windows | What It Means for Installation |
|---|---|---|
| Airborne salt | Corrosion of fasteners, hinges, and lesser hardware finishes | Use corrosion-resistant fasteners and hardware rated for coastal exposure |
| Wind-driven rain | Water forced into joints and laps under pressure | Full flashing sequence with head flashing and back-dammed sills, not sealant alone |
| Prolonged dampness / moss | Sustained moisture at sills and trim | Sloped sills, clear drainage paths, and rot-resistant trim materials |
| Temperature swings, marine humidity | Condensation between panes or at frames | Proper glazing package and balanced house ventilation |
What a Correct New-Construction Window Install Actually Involves
New-construction windows are installed before or during the siding phase, which means the window opening, the water-resistive barrier (WRB), and the flashing all have to work together as one system. Get this sequence wrong and no amount of caulking fixes it later — the problem is buried behind finished walls.
The Flashing Sequence
A correct install follows a shingle-style, water-shedding order: sill pan flashing first (sloped to drain outward, with back dams to stop water running back toward the interior), then the window unit set into the pan, then jamb flashing, then head flashing that laps over the WRB above the opening. Every layer overlaps the one below it, the same way roof shingles do, so water is always directed outward and down — never trapped.
Integration with the Water-Resistive Barrier
The WRB (house wrap) has to be cut, lapped, and taped correctly around each opening so it ties into the flashing without gaps. On a coastal, high-wind-driven-rain site, this integration matters more than the window unit itself in a lot of failure cases we've seen — the window can be excellent and still leak if the wall behind it wasn't sequenced correctly.
Setting, Shimming, and Fastening
Windows need to be set plumb, level, and square, shimmed at the manufacturer's specified points (not just at the corners), and fastened with corrosion-resistant fasteners at the spacing the manufacturer requires for the wind load in this area. An out-of-square window stresses the frame, binds the sash, and opens gaps at the corners over time.
Interior and Exterior Sealing
Low-expansion foam or backer rod and sealant at the interior gap controls air leakage and condensation risk. Exterior sealant is a secondary line of defense, applied at specific points — never as a substitute for proper flashing.
Choosing Window Products for a Point Roberts Build
There's no single "best" window material — the right choice depends on your budget, the elevation's exposure, and how much long-term maintenance you want to take on. We'll walk through options honestly rather than push whatever's easiest to install.
| Frame Material | Coastal Performance | Maintenance | Typical Fit |
|---|---|---|---|
| Vinyl | Good corrosion resistance; quality varies significantly by manufacturer | Low | Budget-conscious builds, most elevations |
| Fiberglass | Very stable in temperature swings and marine humidity; strong hardware retention | Low | High-exposure elevations, larger openings |
| Aluminum-clad wood | Attractive exterior durability if cladding and seals are well-maintained | Moderate — depends on seal integrity over time | Design-forward builds where appearance matters |
| Solid wood (unclad) | Highest maintenance burden in salt air and driving rain | High | We generally steer clients away from this on exposed coastal elevations |
We're not going to tell you a product is "bad" — we'll tell you honestly what its maintenance schedule and moisture behavior look like on a site like this one, and let you weigh that against upfront cost and appearance. On the water-facing side of a Point Roberts lot, that trade-off conversation is worth having before the order goes in, not after.
Our New-Construction Window Process
- Plan review: We review window schedules, elevations, and rough openings against the wall assembly and this site's specific exposure before ordering anything.
- Product selection walkthrough: We go over frame material, glazing package, and hardware options with you, weighted toward the elevations that take the worst weather.
- Opening prep and inspection: Rough openings are checked for square and correct size, and the WRB is confirmed to be properly lapped before a single window goes in.
- Sill pan and flashing installation: Sloped, back-dammed sill pans go in first, following manufacturer flashing instructions and best-practice shingle-lap sequencing.
- Window setting: Units are set plumb, level, square, and shimmed at manufacturer-specified points, then fastened per the wind-load fastening schedule.
- Head flashing and WRB integration: Head flashing laps over the WRB, completing a continuous drainage path from the top of the opening down and out.
- Interior and exterior sealing: Backer rod and sealant at the interior; exterior sealant at specified joints only, never as the primary water barrier.
- Final inspection and documentation: Every opening is checked before siding closes it up, and we document the install for your records and warranty.
Mistakes We See on Coastal New Builds
Most window failures we get called to diagnose in this area trace back to a handful of repeatable errors, usually made by crews unfamiliar with coastal, wind-driven-rain conditions:
- Sill pans installed flat instead of sloped, so water sits instead of draining
- WRB cut too tight around the opening, leaving no lap for the flashing to tie into
- Fasteners driven at inconsistent spacing or with standard (non-corrosion-resistant) hardware
- Sealant used as the primary water barrier instead of a backup to proper flashing
- Windows shimmed only at the corners, leading to sash binding and early hardware wear
- No documentation of the flashing sequence, making warranty claims harder to support later
Every one of these is avoidable with the right sequence and materials. None of them are visible once the siding goes up — which is exactly why the install needs to be right the first time.
A Homeowner's Checklist for the Window Phase
If you're working with a builder and want to stay informed during the window install phase of your new build, these are the things worth asking about:
- Ask whether sill pans are sloped and back-dammed, not just flat flashing tape
- Confirm the WRB is lapped over the flashing in shingle-style order, top to bottom
- Ask what fastener type is being used and whether it's rated for coastal/salt-air exposure
- Get the manufacturer's installation instructions referenced — most warranties require following them exactly
- Ask for photos of the flashing sequence before siding covers the openings — this is the one chance to verify the work
- Confirm glazing package matches the exposure of each elevation, especially west- and southwest-facing walls
Why Local Coastal Experience Matters for This Job
Point Roberts is a small, distinct community, and its exposure to the Strait of Georgia isn't quite the same as a lot in downtown Blaine or further inland in Whatcom County. A crew that mainly works sheltered, inland builds can still install a window correctly on paper and still get the flashing sequence wrong for wind-driven rain, or spec hardware that corrodes faster than expected in salt air. Working new-construction window installs across this region — including Point Roberts specifically — means we've already made the adjustments for this site's weather before your first window ever goes in.
We also know this community is easy to overlook because of its geography — it's a border crossing away from the rest of Whatcom County. That's exactly why we treat it as a normal part of our service area, not an inconvenient add-on. Scheduling, material delivery, and border-crossing logistics are all things we plan for up front, so they don't become your problem mid-build.
What to Expect Timeline-Wise
New-construction window installs are scheduled around your builder's framing and dry-in timeline — windows typically go in once the WRB is up and rough openings are ready, and before siding starts. We coordinate directly with your general contractor or builder so the sequence stays tight and the wall doesn't sit open to weather longer than it has to, which matters even more on a site that sees this much wind-driven rain.
If you're planning a new build or major addition in Point Roberts and want windows installed the right way from the start, we're glad to walk the plans with you and put together a free, no-pressure estimate — no obligation, just a straight answer on what your project needs.