 Blaine Exterior
 Custer's Climate Is Harder on Siding Than Most Homeowners Realize
Custer sits close enough to the water and to the open fields of Whatcom County that homes here take a combination of punishment few siding products are built to handle. Salt-laden air drifts in off the Strait, driving rain comes in sideways during winter storms, and the long gray stretch from fall through spring keeps exterior walls damp for months at a time. Add the shade from mature trees and the fog that settles into low-lying yards, and you get near-ideal conditions for moss, algae, and mildew to take hold on anything that stays wet.
Most siding failures we see in this area aren't dramatic. They're slow: paint that chalks and peels early, seams that swell, panels that cup or bow, and moss creeping up from the bottom courses where moisture lingers longest. By the time a homeowner notices, the damage is often already working its way into the sheathing behind the siding. The right material choice, paired with a correct installation, is what keeps that cycle from starting in the first place.
Why We Install Only James Hardie Fiber Cement
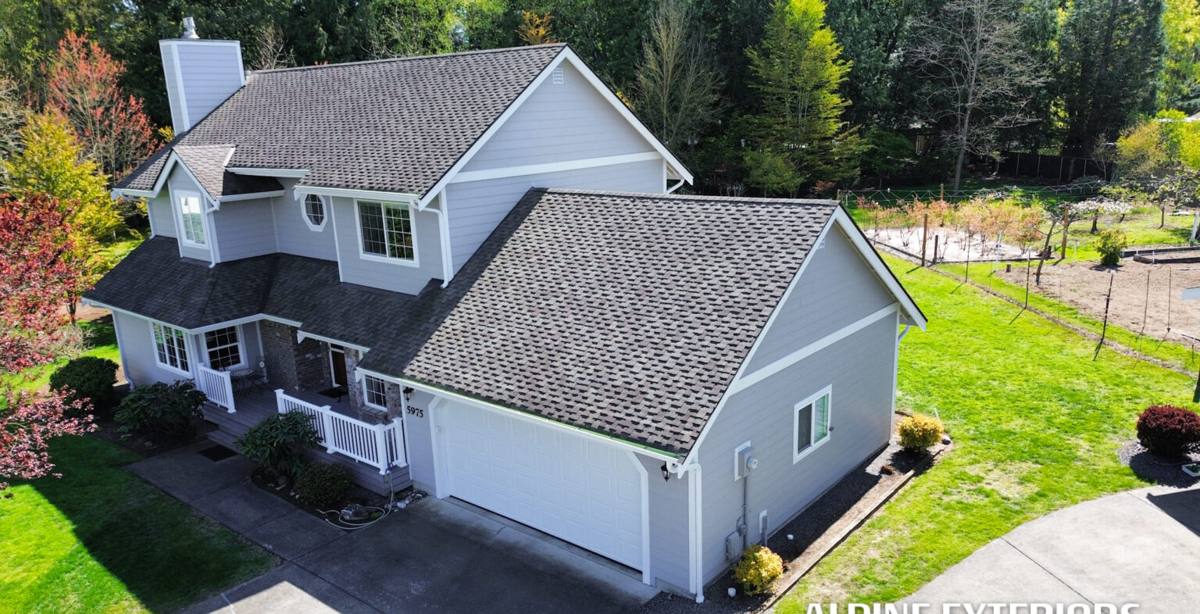
We made a decision as a company to install James Hardie siding exclusively, and Custer's climate is a big part of why. Fiber cement is engineered from cement, sand, and cellulose fibers — it does not have the wood content that gives pests, rot, and moss something to feed on, and it does not expand and contract with humidity the way wood-based and some engineered wood products do. That matters directly here: a material that stays dimensionally stable in a wet, humid marine climate is a material that keeps its seams tight and its paint film intact.
James Hardie's ColorPlus factory finish is baked on under controlled conditions rather than field-applied, which gives it better adhesion and UV resistance than most site-applied paint jobs. It's also non-combustible, which is a real consideration in Whatcom County given the dry-season wildfire risk that's become more common across the Pacific Northwest in recent years. We don't install vinyl, LP SmartSide, primed spruce, cedar, or other fiber cement brands — not because those products can't be installed well by someone, but because we've standardized our crews, our warranty backing, and our process around one system we can install correctly every time and stand behind.
Matching the Right Hardie Product to a Custer Home
James Hardie makes several product lines, and the right one for a given home depends on its style, exposure, and how much wall area is shaded or facing prevailing weather. HZ5 products are engineered specifically for climate zones that see extended moisture and freeze-thaw cycles, which fits western Whatcom County well.
| Product Line | Best Use | Why It Fits Custer |
|---|---|---|
| HardiePlank Lap Siding | Traditional horizontal siding, most home styles | Widest color and texture range; handles wind-driven rain well when lapped and flashed correctly |
| HardiePanel Vertical Siding | Modern facades, accent walls, gable ends | Fewer horizontal seams for water to catch on exposed elevations |
| HardieShingle Siding | Craftsman and cottage-style homes | Staggered or straight-edge look without the moisture retention of real wood shingles |
| HardieTrim Boards | Corners, window and door trim, fascia | Won't rot or split at end cuts the way dimensional lumber trim does over time |
Most Custer homes end up with a combination — lap siding for the main field, panel or shingle accents where the architecture calls for it, and Hardie trim throughout so every exposed edge is sealed with the same moisture-resistant material rather than mixing in wood trim that will age differently.
Color Selection for a Marine Environment
ColorPlus finishes are formulated to resist fading, but color choice still matters practically. Darker colors on elevations with heavy afternoon sun exposure will run warmer and show dust and pollen differently than lighter tones. On homes further from town with more tree cover, lighter and mid-tone colors tend to show less moss staining between cleanings. We walk through color and texture options as part of the estimate, factoring in the home's specific sun and shade exposure rather than just picking off a sample card.
What a Correct Installation Actually Involves
Fiber cement siding is only as good as the installation behind it. James Hardie publishes detailed fastening, clearance, and flashing specifications, and skipping steps to save time is where most siding failures — regardless of brand — actually start.
Before the First Board Goes Up
- Full inspection of the existing wall assembly for hidden rot, soft sheathing, or prior water damage
- Removal of old siding and any compromised sheathing, not just a re-side over existing problems
- Installation or verification of a weather-resistive barrier (housewrap) with properly lapped and taped seams
- A rainscreen or drainage gap where wall assembly and exposure warrant it, so incidental moisture has a path to drain and dry
- Correct flashing at every window, door, and roofline intersection — this is where most leaks originate
During Installation
Hardie boards need proper clearance from grade, roof lines, and decks — typically a minimum of a few inches — so water doesn't wick up from below. Fasteners have to be placed at the correct spacing and depth; overdriven or underdriven nails compromise the board's ability to move slightly with temperature changes without cracking. Butt joints get sealed or backed with flashing rather than just caulked and hoped for. Caulking itself is used sparingly and correctly — modern best practice with Hardie products actually calls for less reliance on caulk and more on proper flashing and lapping, since caulk is the first thing to fail in a wet climate.
Finishing Details
Corners, trim, and any penetrations (vents, hose bibs, light fixtures) get sealed and detailed last, since these are common leak points on any home. A final walkthrough should confirm paint touch-up on cut edges, consistent reveal lines, and that every board is fully nailed and secure before the crew leaves.
Our Process From First Call to Finished Wall
Our process is the same discipline on every Custer home we work on:
- On-site inspection and estimate — we look at existing siding condition, trim, moisture points, and take measurements in person rather than estimating from photos alone
- Product and color selection — matched to the home's exposure and the homeowner's style preference
- Tear-off and sheathing check — old siding comes off and we inspect what's underneath before anything new goes up
- Weather barrier and flashing — housewrap, flashing, and drainage details installed to spec, not skipped
- Hardie installation — fastened, spaced, and lapped to manufacturer specification
- Trim, caulking, and touch-up — final detailing at corners, penetrations, and cut edges
- Walkthrough — we go over the finished job with the homeowner before calling it done
What Drives Cost on a Custer Siding Project
| Factor | Why It Matters |
|---|---|
| Home size and wall complexity | More corners, gables, and cutouts mean more labor and material waste |
| Existing siding removal | Tear-off and disposal of old material adds time versus a bare wall |
| Sheathing or framing repair | Hidden rot found during tear-off has to be fixed before new siding goes on |
| Product line and texture | Lap, panel, and shingle products vary in material and labor cost |
| Trim scope | Full Hardie trim replacement costs more than reusing sound existing trim |
| Access and site conditions | Steep grades, tight lot lines, or multi-story walls affect staging and labor time |
We give real numbers after an in-person inspection rather than a phone quote, because hidden sheathing damage or unusual wall geometry can change scope significantly once we're actually looking at the wall.
Why It Matters That We Already Work in This Area
A crew that regularly works Custer and the surrounding parts of Whatcom County knows what this specific stretch of climate does to a house over a full year, not just what a spec sheet says. We know which elevations on a typical local lot take the worst of the driving rain, where moss tends to establish first, and how salt exposure changes depending on how close a property sits to the water. That local pattern recognition shapes decisions on-site — where to add extra flashing attention, which color families hold up best against the specific grime this area produces, and how much drainage gap a given wall assembly actually needs.
It also means we're not guessing at permitting or code requirements for Whatcom County jobs, and we're a known, reachable crew if a question comes up on your siding years down the road — not a company that did one job in the area and moved on.
Keeping Hardie Siding Looking Right in a Wet Climate
Correctly installed Hardie siding is low-maintenance, but "low" isn't "none," especially in a moss-prone climate like Custer's.
- Rinse siding with a garden hose once or twice a year to clear pollen, dust, and early moss growth before it takes hold
- Avoid high-pressure washing directly at seams and joints, which can force water behind the boards
- Keep gutters clean and downspouts directed away from the foundation so wall bases don't stay wet
- Trim back trees and shrubs so siding gets airflow and sun exposure to dry out between rains
- Have caulking and trim checked every few years, since these are the first points to show wear even on a well-installed job
- Address any paint chips or cut-edge exposure quickly to keep the factory finish's protection intact
If you're weighing a siding replacement on a Custer home, we're happy to come take a look, walk the exterior with you, and put together a straightforward, no-pressure estimate based on what your house actually needs.